Taking Screenshots on Mac Without Breaking a Sweat
Are you tired of navigating through multiple apps or tools to take a screenshot on your Mac? Do you wish there was a quicker and easier way to capture what's on your screen? You're in luck because taking screenshots on Mac is easier than ever, thanks to various shortcuts and built-in tools. In this article, we'll explore three simple ways to take a screenshot on Mac using shortcut keys, the Screenshot app, and the Grab Utility tool. Whether you're a beginner or an experienced Mac user, you'll learn how to take screenshots and save them as files in a snap.Method 1: Using Shortcut Keys
If you're looking for the quickest way to take a screenshot on your Mac, shortcut keys are the way to go. Here are some popular shortcut keys that will help you capture your screen in an instant:- Command + Shift + 3: Captures the entire screen and saves it as a file on your desktop.
- Command + Shift + 4: Enables the crosshair, allowing you to select a specific area of the screen to capture.
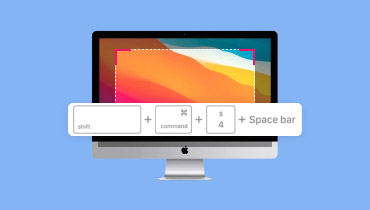
- Command + Shift + 4 + Space: Captures a window or menu on the screen.
Method 2: Using the Screenshot App
- Open the Screenshot app by searching for it in Spotlight or navigating to Applications > Utilities > Screenshot.
- Choose the type of screenshot you want to capture, such as "Capture the entire screen," "Capture a selected portion of the screen," or "Capture a window or menu."
- Use the options provided to customize your screenshot, such as setting a timer delay or including the pointer or clicks.


 - iGeeksBlog")


: Complete Methods & Tips")


