Setup VPN Connection on Mac: A Comprehensive Guide
Are you looking for a way to securely browse the web, access blocked websites, and protect your online activity on your Mac? Look no further! In this article, we will guide you through the process of setting up a VPN connection on your Mac, providing you with a safe and private online experience.
What is a VPN and Why Do I Need It?
A Virtual Private Network (VPN) is a service that allows you to create a secure and encrypted connection between your Mac and a VPN server. This connection masks your IP address, making it difficult for hackers and surveillance agencies to track your online activity. A VPN is essential for anyone who wants to protect their online privacy and security.
Finding the Right VPN Service
With numerous VPN services available in the market, choosing the right one can be overwhelming. Here are a few features to consider when selecting a VPN service:
- Encryption:** Look for a VPN service that offers military-grade encryption (AES-256) to ensure your data remains secure.
- Server Locations:** Opt for a VPN service with a large number of server locations worldwide to ensure you can access content from any region.
- Speed and Performance:** Choose a VPN service that offers fast speeds and reliable performance to ensure smooth browsing and streaming.
- Security and Anonymity:** Select a VPN service that maintains no logs, provides a no-logs policy, and offers advanced security features like obfuscation and anti-tracking.
Setup VPN Connection on Mac
Now that you have chosen a VPN service, it's time to set up a VPN connection on your Mac. Here are the steps to follow:
- Download and Install the VPN App:** Download the VPN app from the provider's website and install it on your Mac.
- Launch the VPN App:** Launch the VPN app and sign in with your account credentials.
- Connect to a VPN Server:** Select a VPN server location from the list provided and click the "Connect" button.
- Wait for the Connection to Establish:** Wait for the VPN connection to establish, which may take a few seconds to a minute.
- Verify the VPN Connection:** Verify that you are securely connected to the VPN server by checking your IP address, which should now be masked by the VPN server's IP address.
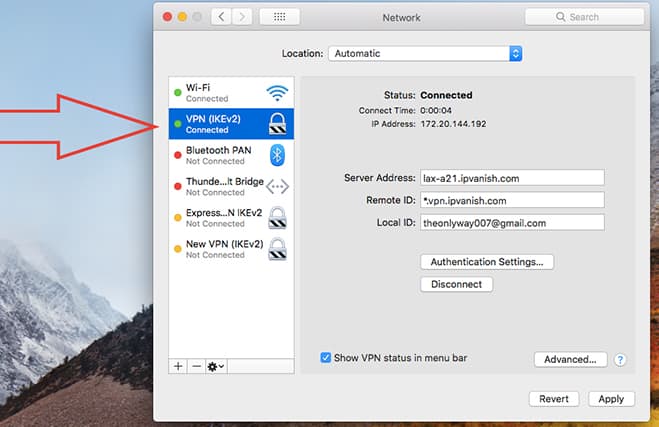
Manual Configuration
If you prefer to set up a VPN connection on your Mac manually, you can do so by following these steps:
- Go to System Preferences:** Go to System Preferences by clicking the Apple logo in the top left corner of the screen and selecting "System Preferences."
- Click on Network:** Click on the "Network" icon in the System Preferences window.
- Click on the Plus (+) Button:** Click on the "+" button at the bottom left corner of the Network window.
- Select VPN:** Select "VPN" from the list of available connection types.
- Choose a VPN Protocol:** Choose the VPN protocol you want to use, such as IKEv2 or PPTP.
- Enter the VPN Configuration:** Enter the VPN configuration details provided by your VPN service provider.
- Click on Apply:** Click on the "Apply" button to save the changes.
- Click on Connect:** Click on the "Connect" button to establish the VPN connection.
Troubleshooting
If you encounter any issues while setting up a VPN connection on your Mac, here are a few troubleshooting tips to help resolve the problem:
- Check the VPN Server Status:** Ensure that the VPN server you are trying to connect to is online and functioning properly.
- Check the VPN App Version:** Ensure that your VPN app is up-to-date, as newer versions often resolve connection issues.
- Check the VPN Configuration:** Double-check the VPN configuration details to ensure they are correct.
Conclusion
Setting up a VPN connection on your Mac is a straightforward process that provides you with secure and private browsing experience. By choosing the right VPN service and following the steps outlined in this article, you can enjoy unrestricted access to content from any region, protect your online activity, and browse the web with confidence. Happy browsing!


![[Instant Guard] How to set up Instant Guard VPN - ASUS](https://help.ui.com/hc/article_attachments/360075682553/macos-l2tp1.png "[Instant Guard] How to set up Instant Guard VPN - ASUS")


