Macbook Pro Keyboard Replacement Process: A Step-by-Step Guide
Is your MacBook keyboard not responding or some keys getting stuck? Before you throw your hands up in frustration, know that replacing your MacBook Pro keyboard can be a relatively straightforward process. In this article, we'll walk you through the MacBook Pro keyboard replacement process, highlighting the tools and techniques you'll need to get the job done.
Why Replace Your MacBook Pro Keyboard?
The keyboard is one of the most critical components of your MacBook Pro, and it can wear out over time due to heavy use. If your keyboard is malfunctioning, sticky, or damaged, it can be frustrating and affect your productivity. Replacing your keyboard can breathe new life into your laptop, making it feel like new again.
Tools and Materials Needed
- A compatiblereplacement keyboard specific to your MacBook Pro model.
- Precision screwdrivers for removing the device's screws.
- A spudger or plastic opening tool to gently pry open the device.
- An anti-static wrist strap to protect the internal components from static discharge.
Step 1: Prepare Your MacBook Pro
Before you begin the replacement process, make sure you have all the necessary tools and materials. Shut down your MacBook Pro and unplug the power cord. Remove any external devices, such as USB drives or SD cards.
Step 2: Remove the Back Panel
Use a precision screwdriver to remove the screws holding the back panel in place. Gently pry open the panel using a spudger or plastic opening tool. Be careful not to damage any of the internal components.
Step 3: Disconnect the Keyboard Cables
Locate the keyboard cables and gently pull them out of their connectors. This will disconnect the keyboard from the motherboard.
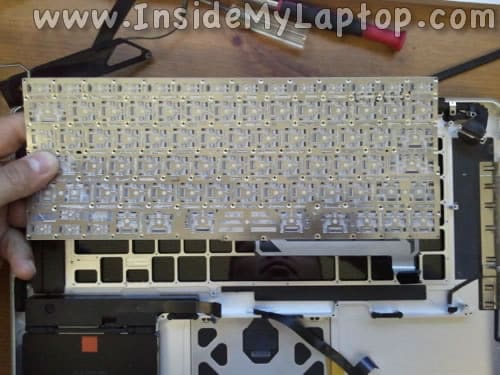
Step 4: Remove the Keyboard
Use a spudger or plastic opening tool to carefully pry the keyboard away from the back panel. Be careful not to damage the keyboard or any of the surrounding components.
Step 5: Remove the Old Keyboard
Once the keyboard is removed, you can access the old keyboard. Remove any screws or clips holding the old keyboard in place.
Step 6: Install the New Keyboard
Take the new keyboard and align it with the mounting points on the back panel. Secure the keyboard using screws or clips.
Step 7: Reconnect the Keyboard Cables
Reconnect the keyboard cables to their respective connectors. Make sure they are securely connected to avoid any issues.
Step 8: Reassemble the MacBook Pro
Put everything back together in reverse order. Reattach the back panel and secure it with screws.
Conclusion
Replacing your MacBook Pro keyboard can be a relatively straightforward process. With the right tools and a bit of patience, you can breathe new life into your laptop. Remember to handle the internal components with care to avoid any damage. If you're not comfortable with the replacement process, consider seeking the help of a professional.
Additional Tips and Resources
For more information on the MacBook Pro keyboard replacement process, check out the following resources:
- Apple's Official Support Page: MacBook Pro 2015 Model (also known as Retina 13)
- iFixit's MacBook Pro Repair Guide: MacBook Pro 13-Inch Retina Display Late 2015 Fix Guide
Remember to always handle your MacBook Pro with care, and if you're unsure about any part of the replacement process, don't hesitate to seek help from a professional.


: 7 New Features Coming Later This Year")


